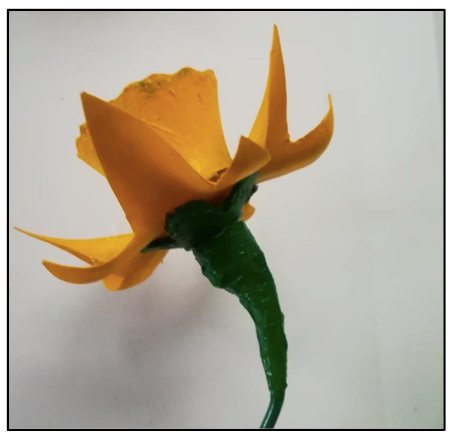
How to Make Plastic Bottle Daffodils
- Watlington Climate Action Group

- Mar 2, 2021
- 3 min read
It’s been a long, tough winter, but spring is not far away. Bring spring into your home early this year by making your own daffodils out of plastic bottles!

Not only will you have daffodils that last for years, but you also help to keep a bit of plastic waste out of landfill. Here’s how to make one:
Materials:
1 x plastic bottle (ideally a narrow-necked eg. a tonic water/cordial bottle),
1 x cork (or lump of plasticine/blu-tack),
1 x top of a toothpaste tube,
Yellow and green acrylic paint (or pva glue and poster paint mixed together). Fabric or paper tape (eg. sticky plaster or masking tape). A 30cm length of thick wire (eg from a wire coat hanger – I used pieces from some leftover garden border edging).
Tools:
A strong (and non-precious) pair of scissors, a drill or nail and hammer, a non-permanent felt tip, hot glue gun, medium paint brush, junior hacksaw (or serrated kitchen knife).
1. Cut the neck and bottom off the plastic bottle with the scissors. Then cut a wiggly edge to the wide end of the neck section. Next, using the hacksaw or serrated knife, cut off the screw fitting part of the neck above the. You may need help from an adult to do this. You may need to smooth off the sawed edge with a nail file or course sandpaper. This is the ‘trumpet’ part of the daffodil.

2. Next, using the felt tip, draw a flower shaped outline on the bottom section and cut this out with the scissors. Either cut inside the felt pen line, or clean off the marks afterwards. This is the outer petal part of the daffodil.


3. To make the centre of the flower, cut off a section of cork using a serrated kitchen knife. The cork should fit snugly into the top of the neck section. Then cut the edges off one end with the scissors to round it off. A bit of sandpaper will also help shape it. If you don’t have a cork, you could use a ball of plasticine or blu tack to fill the bottle top end.
4. Next, using a drill (or a nail and hammer), make a hole in the centre of the outer petal piece. Also, make a hole in the back of the cork – you will only need to push a nail in by hand for this as the cork is so soft, but don’t push all the way through.

5. Then mark out a flower type shape on the toothpaste tube top with the felt pen, and cut it out with the scissors so it looks like this. This is a bit tricky, so might need to be done by an adult. This will make the back part of the flower that joins to the stem.

6. Now you’re ready to paint the pieces. Using a medium paint brush, paint on the yellow acrylic paint taking care to keep the brush strokes radiating out from the centre to the petal tips (or lengthways on the ‘trumpet’ part). You will probably need 2-3 coats. Each coat should dry in a warm place in 2-3 hours. Paint the cork centre too, or the plasticine/blu tack and stipple the paint to give it texture.

7. Then paint the wire stem and toothpaste tube top green. You may need to bind the wire stem with masking tape or fabric tape first so the paint sticks.
Assembling your flower:

8. Put a bit of hot glue around the outside of the cork centre piece and stick it into the narrow end of the ‘trumpet’ part of the flower. Any excess glue that shows can be painted over with the yellow paint if necessary.

9. Take your wire coat hanger stem and hot glue one end into the back of the cork (or plasticine). Bend the wire to give the curved shape of a daffodil stem.
10. Then thread the outer petal piece onto the stem from the other end, with the petals curving inwards, and glue the cork/plasticine onto it.

11. Next, thread the toothpaste tube top onto the stem, with the green painted side facing down. Put a blob of glue on the inside of each lobe and stick it to the back of the outer flower, with the lobes fitting in between the raised petals.

12. Finally, bind some fabric tape, sticky plaster or masking tape over the screw part of the toothpaste tube top and down onto the wire stem so that it secures it and merges the flower into the stem. Paint the tape with some more green paint and leave to dry.
Your daffodil is now finished and ready to display in a vase!
Attached Instruction - Guide


Comments